Or, "A Royal Mitre Exchange."
With 14
players spread over 3 tables, last Saturday saw the biggest VBCW Herefordshire Big
Game yet!
Once again
VBCW gamers from across the country converged on Burley Gate Village Hall to
take part in our latest scheme. The story so far was this:-
The
Battle of Foy saw the combined Royalist/BUF force trapped in the Foy salient, almost
totally surrounded by the River Wye and cut off from the land route by the
sabotaged Hereford-Ross railway, along which runs the Anglican League lines.
Soon the
Royalists and BUF began to squabble as each faction blamed the other for their
predicament. This was also fuelled by the rivalry between the Royalist Governor
of Hereford and the newly arrived BUF kingpin the Baron of Foy.
Keen to
capitalise on the infighting, The Anglican League approached the not
unsympathetic Royalists with a proposition: release their spiritual leader the
Bishop of Hereford (re)captured during the
2nd Battle of Ledbury; in return for
safe passage out of the Foy enclave and an honourable withdrawal back to
Hereford. To the BUF’s fury, the Royalists had agreed to this plan.
So the scene
was set. Table 1 represented the route that the Royalists, transporting the
Bishop, would have to take in order to reach table 2, representing a portion of
the Anglican League siege lines where the exchange would take place. Table 3 represented
the undulating countryside on the Anglican’s west flank.
 |
| Table 1 |
 |
| Table 2 |
 |
| Table 3 |
Briefings
were as follows:
Royalist
Briefing
Sirs,
With the bulk of the King’s forces in
Herefordshire trapped at Foy, William de Braose, Interim Governor of the
Marches, has brokered a deal with the Anglican League.
The former Bishop of Hereford, currently a
guest at His Majesty’s pleasure, will be handed over to the Anglicans in return
for your safe passage out of the Foy entrapment.
You will be allowed to pass
through the Anglican siege lines with full military honours once the Bishop is
in their hands. The Anglicans can be relied upon to honour their side of the
bargain (although privately you think them foolish to give up such a catch as
your Royalist force in exchange for a doddery old Bishop!), but the same cannot
be said for your ‘allies’ the BUF, who have shown themselves to be an utter
shower.
The Governor himself is
currently en-route to the handover point, which you are currently guarding in
conjunction with the Anglican League. He expects you to ensure the column
arrives with him and the Bishop in one piece. You must ensure that the Bishop
is in Anglican hands - then they will allow you to exit the table through their
lines in an honourable withdrawal back to Hereford.
Unfortunately scouts
have reported large groups of armed agitators and brigands in the area, whilst
the BUF trapped in Foy with you are being unusually cocksure at the moment…
 |
| The Royalists' route |
BUF Briefing
Fascists,
Thanks to the
pathetic efforts of your ‘allies’ the Governor of Hereford and his Royalists, a
large portion of your forces are trapped at Foy – the estate of your leader and
Mosley’s man, Sir Peter Mandie-Benjamin, 1st Baron Benjamin of Foy.
To make matters
worse, your ‘allies’ are planning to desert you after doing a shady deal with
the rebels (a deal which you have contemptuously dismissed out of hand) in
which they get their Bishop back in return for you ‘allies’’ freedom.
Baron Foy demands
action! You must show the world who is boss! Foy has arranged for the Bishop’s
route to be ‘leaked’ to a nearby band of brigands, who will no doubt try to attack
his column. This will buy you enough time to launch a lightning attack on the
rebels and burst through their siege lines while they divert troops to rescue
their leader. Your ‘allies’ had better not get in your way…
As a further
diversion, Baron Foy has also ordered those BUF troops not under siege to
attack the territory of that cur Sir Gilbert on the Anglican flank in the
Golden Valley. Foy is hell bent on revenge, and demands at least one of Gilbert’s
much vaunted flags as a trophy.
Anglican
League Briefing
Chaps,
Under the leadership of Brigadier Gideon
Langnecke, the Anglican League has trapped a sizeable Royalist/BUF force at
Foy. However the cost of maintaining the siege is draining your already meagre supplies
at an alarming rate.
Luckily you have been approached by the
Royalists, who you know to be an honourable bunch, with a proposal: In return
for the return of your spiritual leader the Bishop of Hereford, you will allow
the forces of the King guaranteed safe passage through your siege lines and an
honourable withdrawal back to Hereford.
The return of the Bishop will be a massive
morale boost for your men, not to mention the greater Anglican cause, and if
all passes off cordially will also open the possibility of a united local front
with the Royalists against those rascals in the BUF.
The Royalist Governor is
currently en-route to the handover point, which you are currently guarding in
conjunction with his men. Brigadier Langnecke expects you to ensure that the
Bishop arrives with him and that he is in Anglican hands. You will then allow the
Royalists to exit the table through your lines.
Be on the lookout for those Fascist rogues
though – they are bound to spoil the party at Foy and have also been spotted
lurking around your flank near Sir Gilbert’s patch in the Golden Valley…
 |
| The handover point |
Socialist
Briefing
Comrades,
The fire of revolution is dwindling and it
is up to you to rekindle the flame!
News has reached the West Country People’s
Soviet that the lackeys of the so-called king have done a deal with your
‘allies’ the Anglicans. They intend to hand over the parasite Bishop of
Hereford in return for safe passage out of the hole they’ve got themselves
into. Moreover the bourgeois Fascist lickspittle the Governor of Hereford is
said to be accompanying the Bishop.
Details of the route that the Bishop and his
captors will take has been ‘liberated’ from a Fascist defector and is now in
your hands. The People’s Soviet hereby orders you, their comrades in arms, to
attack this column and capture both the Bishop and the Governor.
If you fail to capture these malcontents
en-route, you also have a platoon of men attached to your Anglican ‘allies’ at
the handover point. Intelligence suggests that the BUF are aiming to spoil the
party here, so you are authorised to do a temporary deal with the devil if need
be.
You must leave the battlefield with the
enemies of the people in your possession, so that they can be tried before a
people’s tribunal for crimes against the Workers’ State. Achieve this objective
at all costs!
 |
| A Socialist On The Buses |
Cue lots of plotting, counter-plotting and general skullduggery from each faction as CinCs were appointed and shady negotiations took place via email!
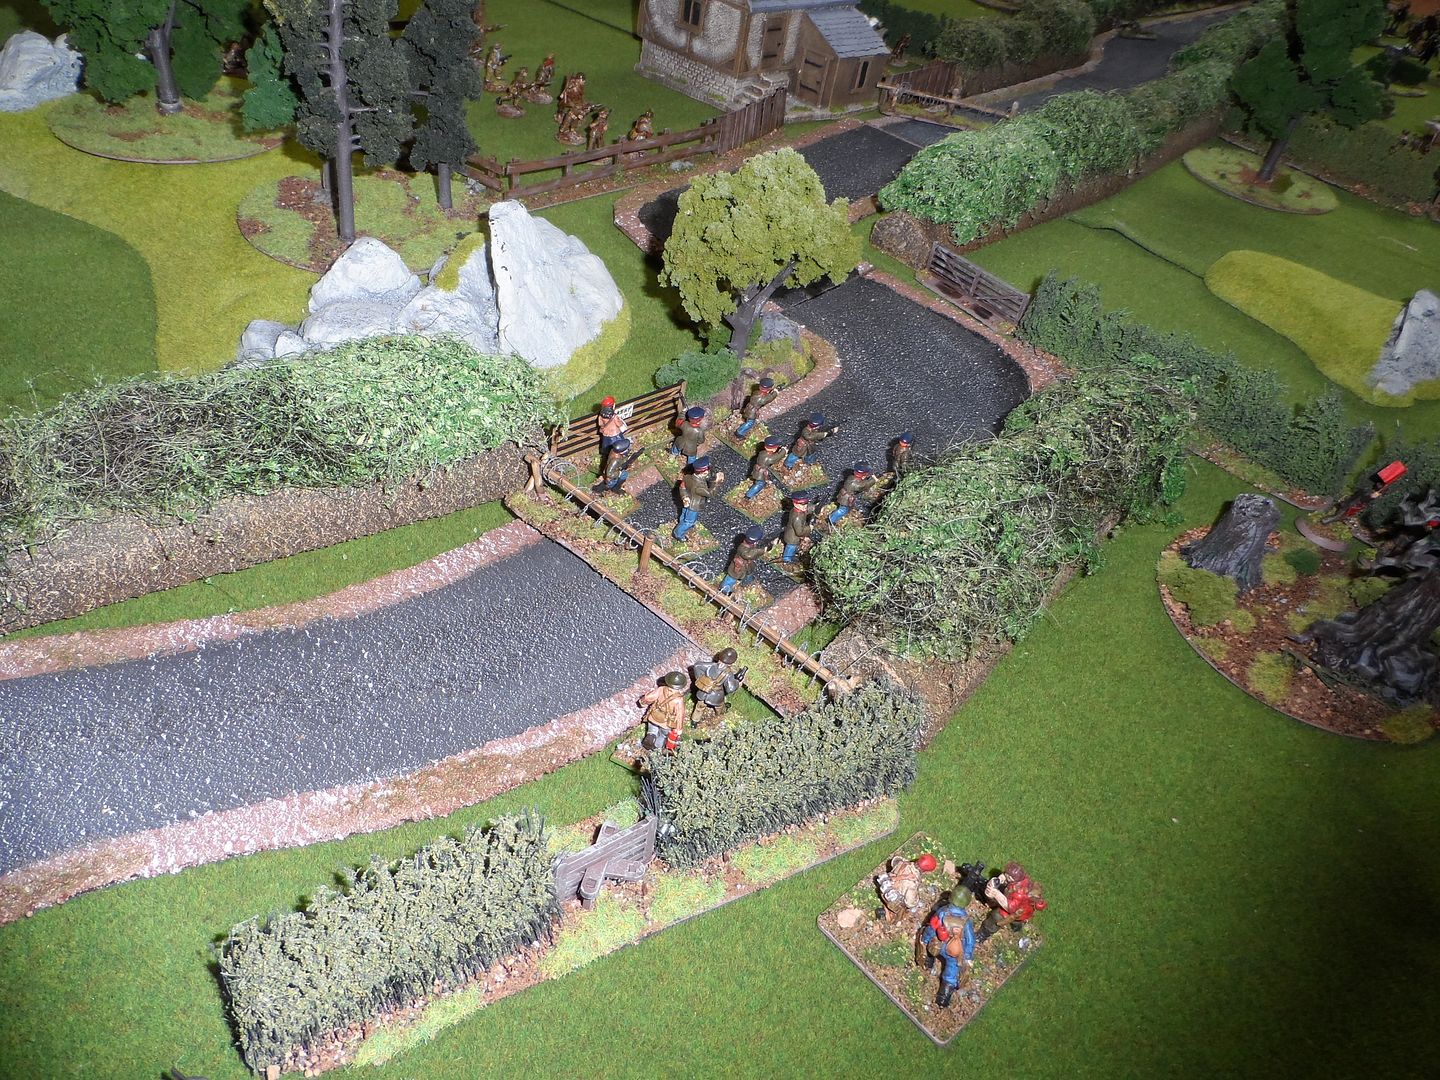
Last minute changes to the player roster saw me donning a red T-shirt and taking the role as one of the Socialist malcontents determined to stop the Royalists from fulfilling their mission and arresting the Bishop and his captor the Governor on table 1. This is what transpired:
 |
| My Socialists de-bus |
Bringing the
revolution to South Herefordshire was me (fielding the N.A.L.U. Joseph Arch
People’s Column) and Matt (of
Glenbrook Games) and his Huntley and Palmer
branch of the Peoples Biscuit Makers collective.
 |
| The Royalist Horse with VIPs |
Facing us
were Tym and his Royalist Horse, alongside ‘Ciderfella’ and the Catholic
militia of Cardinal Alfonso dos Navarre y Asturias – papal Nuncio to court of
St James.
 |
| Morris Dancing Socialist Biscuit Makers! |
Readying
ourselves to pounce, my farm labourers and Matt’s biscuit makers set up
defensive positions across the field, with 2-man bombing teams, complete with
roadside bombs, hand grenades and crowbars, set up at two roadblocks that
blocked the road than wound its way along the table. We also each had a sniper,
set up in lofty positions and with range-finding poles cunningly hammered into
the ground so as not to give away their positions by our tape measures.
 |
| Royalists ready to charge! |
Then the
Royalists arrived, mounted in readiness to charge along the table and ride down
our godless socialists!
 |
| Catholic Cavalry |
Then they
spotted my big tank (a gift from the West Midlands’ Armoured Vehicle
Manufacturers Collective). As our socialist infantry moved up to what we hoped
would be relatively defensible positions along each flank (leaving the centre
to the snipers and bombers), the Royalists dismounted and unlimbered their artillery.
 |
| Socialists advance with big tank |
The biscuit
makers de-bussed around the hills and buildings on our left while my troops
lined the hedgerows to our right, accompanied by the tank. I knew that I
wouldn’t last long in the face of the Royalist artillery, in addition to their
mortars and HMGs, so I resolved to knock the Royalist Horse big gun facing me.
My
tank opened fire, and the Royalist guns duly returned the compliment. My advance
militia also fired, taking first blood by knocking out some Royalist artillery spotters
and forcing their anti-tank rifle team to withdraw.
 |
| Socialist militia dig in |
However this flank saw both sides’ infantry glaring sullenly across
the fields at each other, out of rifle range and probably all the better for
it, for the rest of the game. I took light casualties as the Royalists tried to dislodge the militia with
mortar fire, but their resolve held (despite an event card which drenched the battlefield in a dispiriting drizzle and effected morale). My forward militia dug in for the duration to avoid being raked by the Royalists' HMGs.
 |
| My tank fires |
My tank also held firm, despite being subjected to artillery, anti-tank rifle and mortar
fire. This increasingly battered behemoth stood it’s ground, successfully
rallying any failed morale tests (although it was touch and go occasionally). She also had to contend with Royalist smoke grenades - although no one had brought any smoke markers, so we improvised by using chocolate chip cookies!
 |
| Edgy tank crew takes the biscuit! |
Matt's biscuit
makers were soon engaged in a firefight with the Catholics, who gained the
upper hand after forcing a section of drizzle-soaked socialists to break and flee the
battlefield. However reinforcements were quickly brought up to hold the line.
Further reinforcements entered the fray when a stray Royalist mortar round
landed in the cornfield that separated my militia and Tym’s Royalist Horse.
 |
| On come the scarecrows! |
A
scarecrow stood sentinel over this field and, as both Tym and I are
Herefordshire Big Game veterans, we both knew the consequences of messing with
any ground so marked. The mortar shell was enough to trigger the ire of Twiggy
Mommet rabble and (following a d6 to decide the table edge) a horde of the
protesters arrived to assist Matt’s platoon.
 |
| The Catholic militia unleash hell |
Soon the
biscuit makers began to redress the balance against the Catholics, despite the
annoyance of a hidden Royalist sniper. On my flank the big guns continued to
trade shots, with my socialist mortar team, ably assisted by their spotters,
moving up to add to the barrage. My tank, despite it’s advanced and exposed
position, continued to function, as did the Royalist artillery which, notwithstanding several direct hits, was able to fight on thanks to a nearby medic keeping the
gunners in action.
 |
| Pesky artillery |
It was clear
that we had stopped the Royalist column from reaching the rendezvous point on
table 2, but we had yet to arrest their VIPs. In an effort to break the
deadlock I moved up my close-combat troops. Urged on by their political officer
they scrambled over our barricades, advancing up the road towards the enemy in
the hope of getting in close enough to unleash their shotguns, SMGs and
grenades. The Royalists were having none of it however, catching them in a
deadly crossfire from which the survivors barely managed to extricate themselves
from.
 |
| My shock troops advance |
By now the
Royalists were also aware that they would be unable to push further, despite
the insistence of the Governor of Hereford, who was blissfully unaware of how
close he was to being shot by the Catholics!
 |
| What's left of them withdraw |
The
Royalists’ position was further compounded by the arrival of Tom’s South Wales
Socialists from table 2, where he had harassed our Anglican League ‘allies’ and
generally made a nuisance of himself before exiting at our request in order to
add some extra punch to our next move.
 |
| Red reinforcements |
My sniper, bored of keeping overwatch on a killing ground that the enemy had no intention of crossing, moved from his position in a building, but, thanks to an event card which turned all off-road ground into a quagmire, struggled to get to the firing line. But before we could get into gear and bring our now superior numbers into play, the
Royalists had saddled up and limbered up and withdrew from the field.
 |
| The overall picture at the end |
In retrospect I should have been more aggressive if I were to fulfil my objective. My tank did sterling work in holding up an entire royalist platoon, but I did not capitalise this. Perhaps the best approach would have been to simply burst through the hedges and roll over the artillery position as opposed to firing impotently at it; unsophisticated as this may have been. My infantry could have advanced in it's wake, concentrating it's fire on a section of the Royalist line.
 |
| Socialist rear |
At the very least, once it became clear that the Royalists were not going to sweep towards us, I should have also moved up more elements, such as the sniper, to give them a harder time and support the advance of Matt's platoon. As it was I did my usual trick of moving up one section, unsupported, and saw them driven off by superior firepower. Hindsight is a wonderful thing though, and if every commander knew his business properly then it wouldn't be VBCW!
 |
| Matt's Socialists |
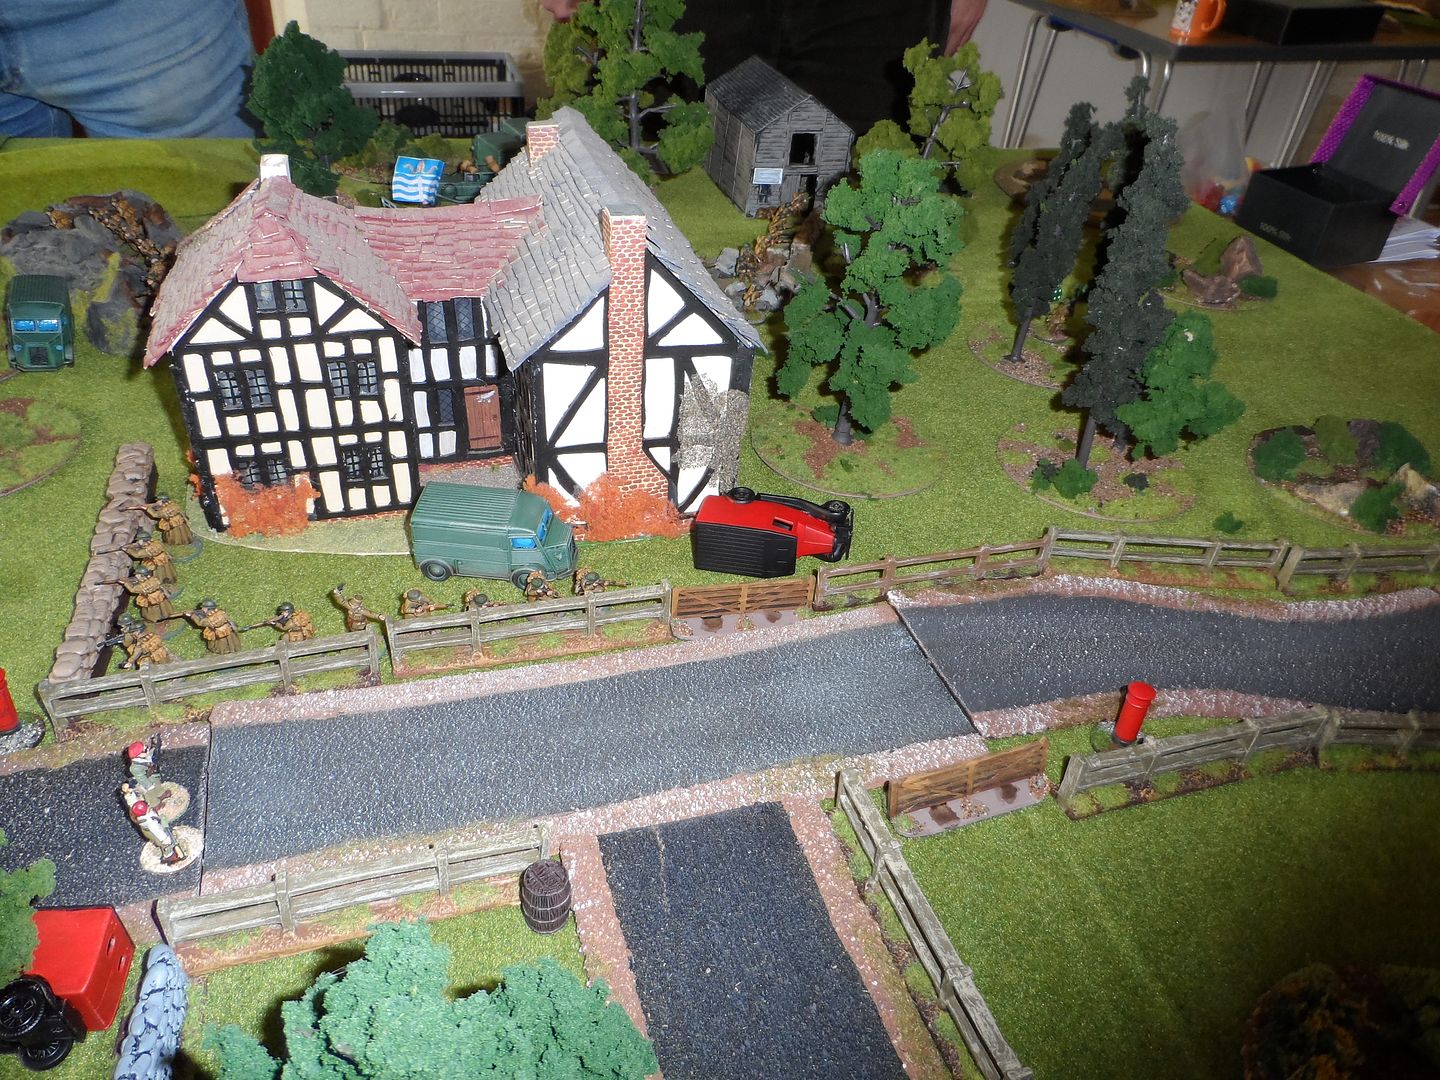
On table 2
the Anglicans, after dealing with the roadside bombs and other sundry suspicious packages littered around their
position by Tom’s sneaky reds, had to face both the Socialist menace and the
Royalist/BUF forces they were trying to contain.
 |
| Anglican League siege lines |
Once the reds disappeared, Capt. Teddy ‘Bear’ Jerningham and Colonel Mouton (on secondment from the French
Foreign Legion) could concentrate on Stokkies Joubert ‘s Royalist South Africans
and the dastardly Fascist Major Campbell. Would the truce between the Anglicans
and the South Africans hold? Would the Saffas turn on their Blackshirt allies?
 |
| IEDs... |
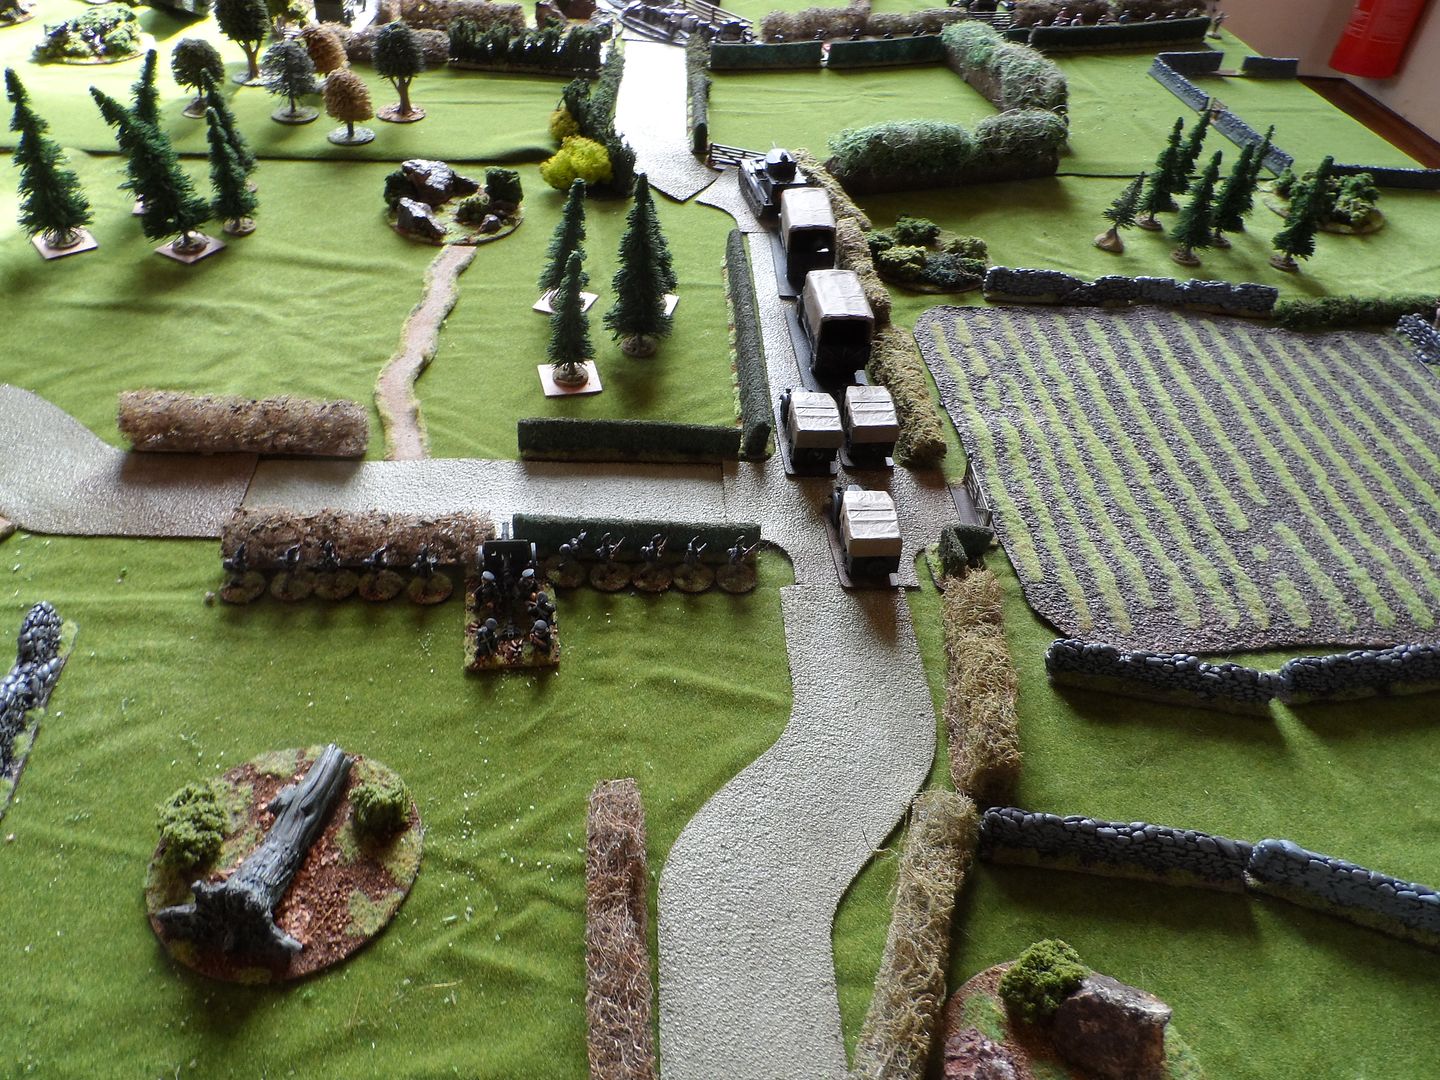
The Royalist South Africans initially held back as the BUF attempted
to force the Anglican lines, only to be bloodily repulsed. As a fog descended
over the battlefield and the factions plotted and counter-plotted while they
awaited the transport column from table 1, the Anglicans offered the South
Africans a way out via a lashed-up pontoon bridge over the River Wye.
 |
| BUF attempt to force a breakout |
The Royalists jumped at this chance of freedom, but unbeknownst to
the Anglicans, had also let the BUF in on the act. Abandoning their heavy
weaponry, the BUF (including a teeth gnashing Baron Foy, forced to join the exodus in disguise) rushed along the pontoon amidst their Royalist allies,
leaving the field to the Anglican League.
 |
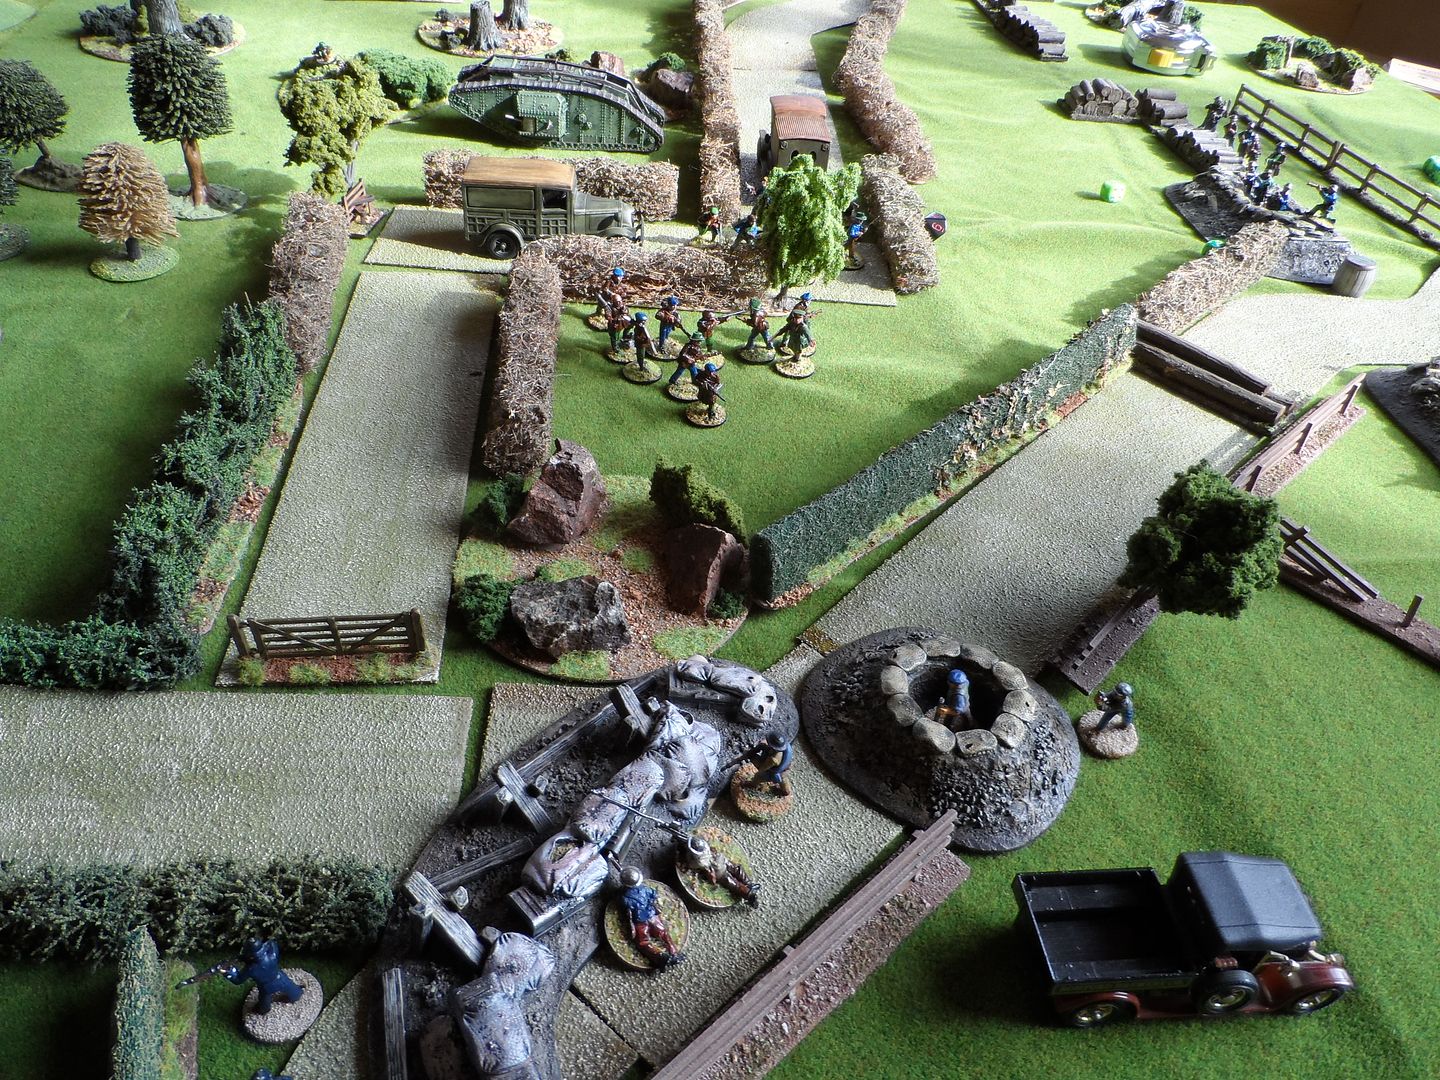
| BUF motorised column advance on Sir Gilbert |
The
Anglicans had also scored a victory on table 3, where the troublesome Sir Gilbert,
claiming the area for the Hill Protectorate of the Golden Valley, saw off a determined diversionary assault from the BUF with the aid of an
Anglican platoon under Captain Carroll.
 |
| Their target... |
BUF darling Captain Arrowsmith was unable to put into effect the lessons he had learned from his visit to Italy and, with his cohort Captain Arnett, floundered against the Anglican defences despite some glorious cavalry charges and some thrilling tank-on-tank action.
 |
| Red hot tank-on-tank action! |
As ever a great day's gaming was had, with all players being good sports who put up with our machinations with good humour. Special mention must go to Roo (he of the South Africans), who knocked up a cracking railway embankment (inspired by
Eric the Shed's tutorial) in a matter of days!
So how does this leave our little campaign?
The Royalists can be considered the joint winner of this round. They have successfully extricated their troops from Foy and yet still have the Anglican Bishop of Hereford in their possession (although this may well depend on if the Catholics get hold of him!) However they have had to abandon a lot of hardware and their boss, the Governor of Hereford, will be furious at his underlings' failure to push aside the red rabble and allow the Baron of Foy's men to escape the Anglican's net.
The Anglican League have also come out on top. While their spiritual leader remains behind bars, they have scored a sound military victory against the BUF by resisting their incursion into Anglican territory. They have also allowed the costly siege of Foy to wind down with very little bloodshed and honoured their side of the bargain despite the Royalists' failure to come up with the goods. Furthermore they now occupy the Baron of Foy's private fiefdom, including a lot of military hardware. On the downside their alliance with the treacherous Socialists is under severe strain, possibly forcing a heavier reliance on the Welsh Nationalists.
The BUF scored a success by escaping the Foy salient, but have had to abandon substantial amounts of matériel. An enraged Baron Foy, not only losing face for this humiliating withdraw, must suffer the further indignity of failing to settle the score with Sir Gilbert Hill. Furthermore he has been forced to leave behind several crates of valuables, still waiting to be unpacked at Foy Manor. On the plus side the BUF's alliance with the Royalists has been strengthened following their collusion and joint escape.
The Socialists can draw satisfaction that they have foiled the plans of the elitist bourgeois parasites, but will rue the fact that they failed to arrest either the Bishop or the Governor when hauled before the People's Committee to explain themselves. They have also soured the already fragile relationship with the Anglican League and must now carry on the fight without their aid.
Once again we used 'Went The Day Well?', with some modifications written by Mort, which definitely improved the rules. Changes to crossing hedges, shooting vehicles and use of initiative cards certainly streamlined the game and reduced tabletop clutter. Oh, and of course, there was also Giles' rules for the sheep!


